
Navigation Elements
This article describes the two main navigation menus in NimbusDash: the left-hand navigation bar and the main menu bar at the top of the dashboard.
Left-Hand Navigation Bar
Section titled “Left-Hand Navigation Bar”- The left-hand navigation bar is collapsed by default, allowing you to interact with the icons for navigation while maximizing page space for the dashboard elements.
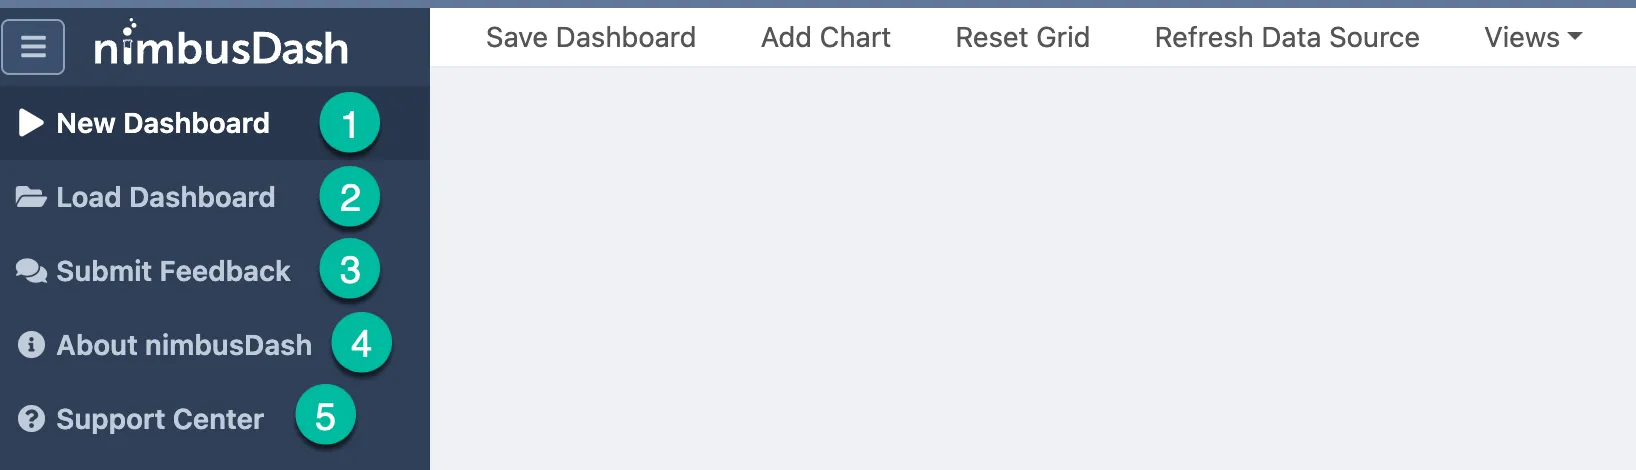
- Click the hamburger menu at the top of the left-hand navigation bar to expand the menu and see the icon labels.
Navigation Elements
Section titled “Navigation Elements”- New Dashboard — Opens the new dashboard configuration page.
- Load Dashboard — Opens the load dashboard page, showing the list of dashboards you have access to.
- Submit Feedback — Opens a form to submit feedback directly to the NimbusLabs team. We encourage you to use this often to let us know anything that can make the application more useful.
- About NimbusDash — Information about your license.
- Support Center — Opens the NimbusDash Support Center in a new tab.
Top Menu Bar
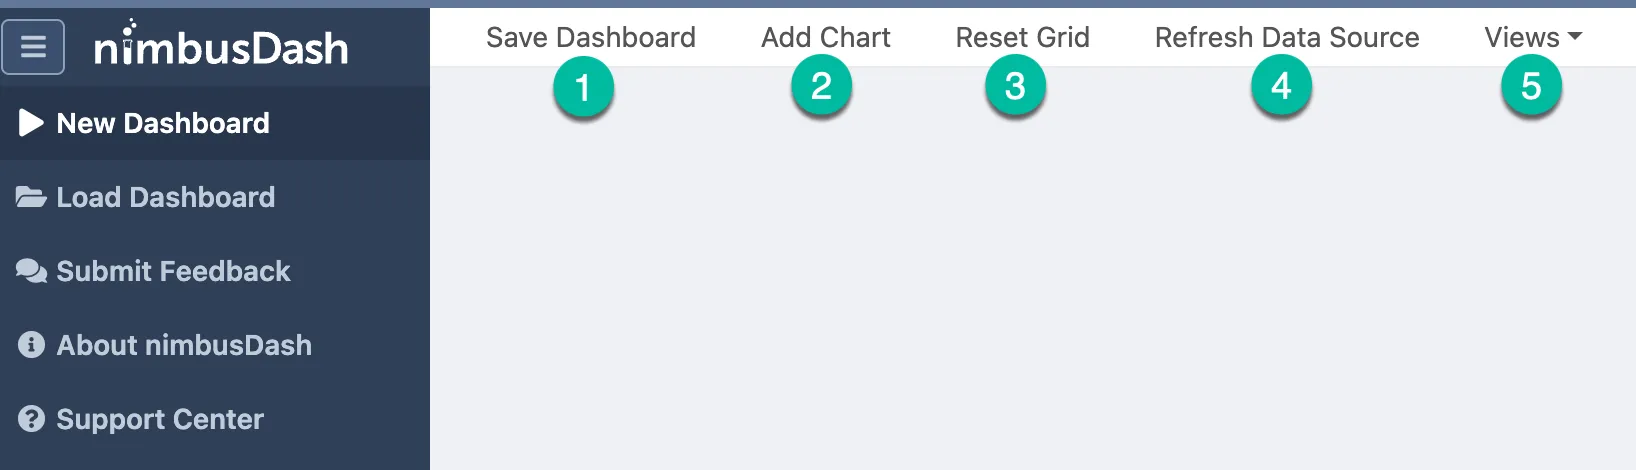
Section titled “Top Menu Bar”- The top menu bar contains the actions for interacting with the current dashboard.
- This menu is anchored to the top of the page for easy access at any time.
Navigation Elements
Section titled “Navigation Elements”- Save Dashboard — Opens the save dialog requiring a Dashboard Name and an optional description.
- Add Chart — Adds a new blank chart widget to the dashboard, which can then be configured using the instructions in the Quick Start Guide or Grids and Charts.
- Reset Grid — Removes all existing filters, column groupings, and/or pivots, bringing the grid back to its original state.
- Refresh Data Source — Pulls the saved search or NimbusQL query results, accounting for any new columns or changes to the data source. The data is updated to reflect the latest result set.
- Views — Used to save a collection of filters to your dashboard.
- For example, you might save a view for Inside Channel Managers that have sold Professional Services products.
- Instead of manually creating the filters each time, set the filters once and then click Views → Save View.
- Provide a View Name and save the view.
- This view will then be accessible anytime beneath the Views menu.
- Switch back and forth between views with a click of a button.