


Efficiently Using Custom Center Categories and Links
April 24, 2021
One of the most common questions I am asked is how to easily find commonly used reports and searches. Anyone who manages or uses NetSuite knows how quickly the list of reports and searches gets overwhelming!
I recommend to everyone to build out a list of company-approved reports and searches and publish them via the native Center Tabs, Center Categories and Center Links.
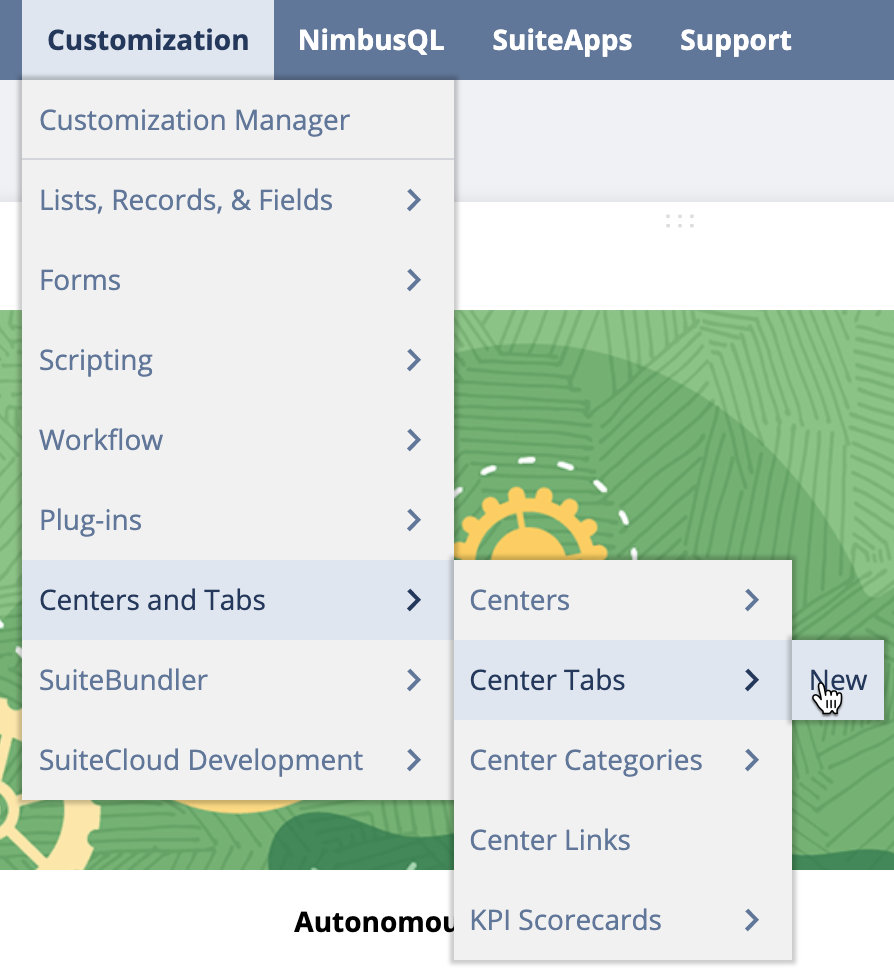
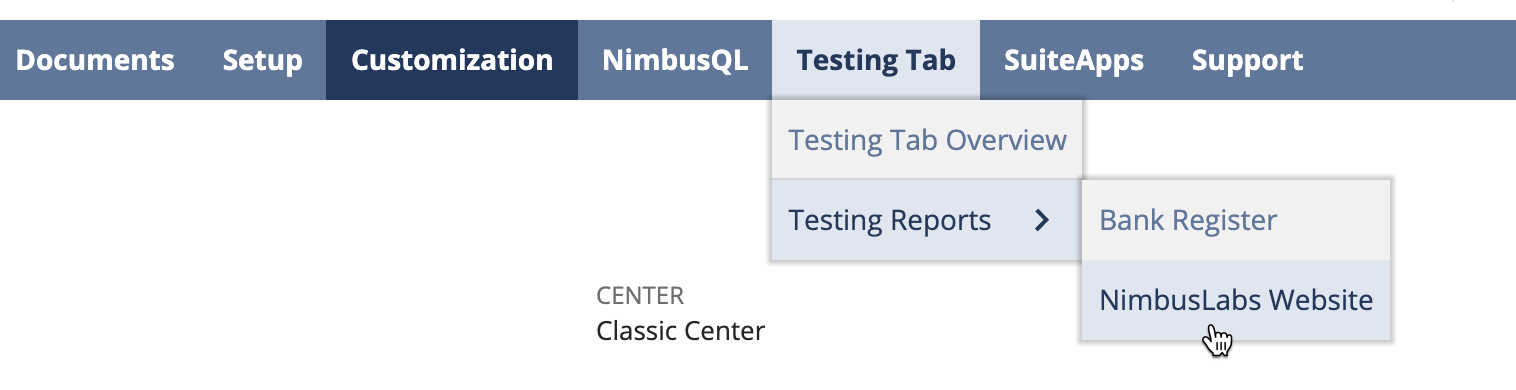
What are Center Tabs, Center Categories and Center Links? The below screenshot highlights the three topics.

- Center Tab – Top-level menu category
- Center Category – Child-level menu category
- Center Link – Actual page (report/search/custom page) link
Why are they called “Center” tabs/categories/links? Each of these are applicable to a particular Center (i.e the Accounting Center, the Sales Center, etc). For some use cases, it makes sense to apply the custom links to ALL centers.
Common Use Cases for Center Tabs/Categories/Links
- Create list of reports/searches to be used for the whole company
- Create menus for function-specific help. Example: Create a list of reports to use for the Accounts Payable team for month-end close processes
How to create Custom Center Tabs/Categories/Link
For our example, we will look at adding center links in the Classic Center, which is used by Administrators. You can follow the same instructions and choose any other center for team-specific links.
Center Tab
- Navigate to Customization –> Centers and Tabs –> Center Tabs –> New
- Enter a Label and choose Classic Center in the Center field.
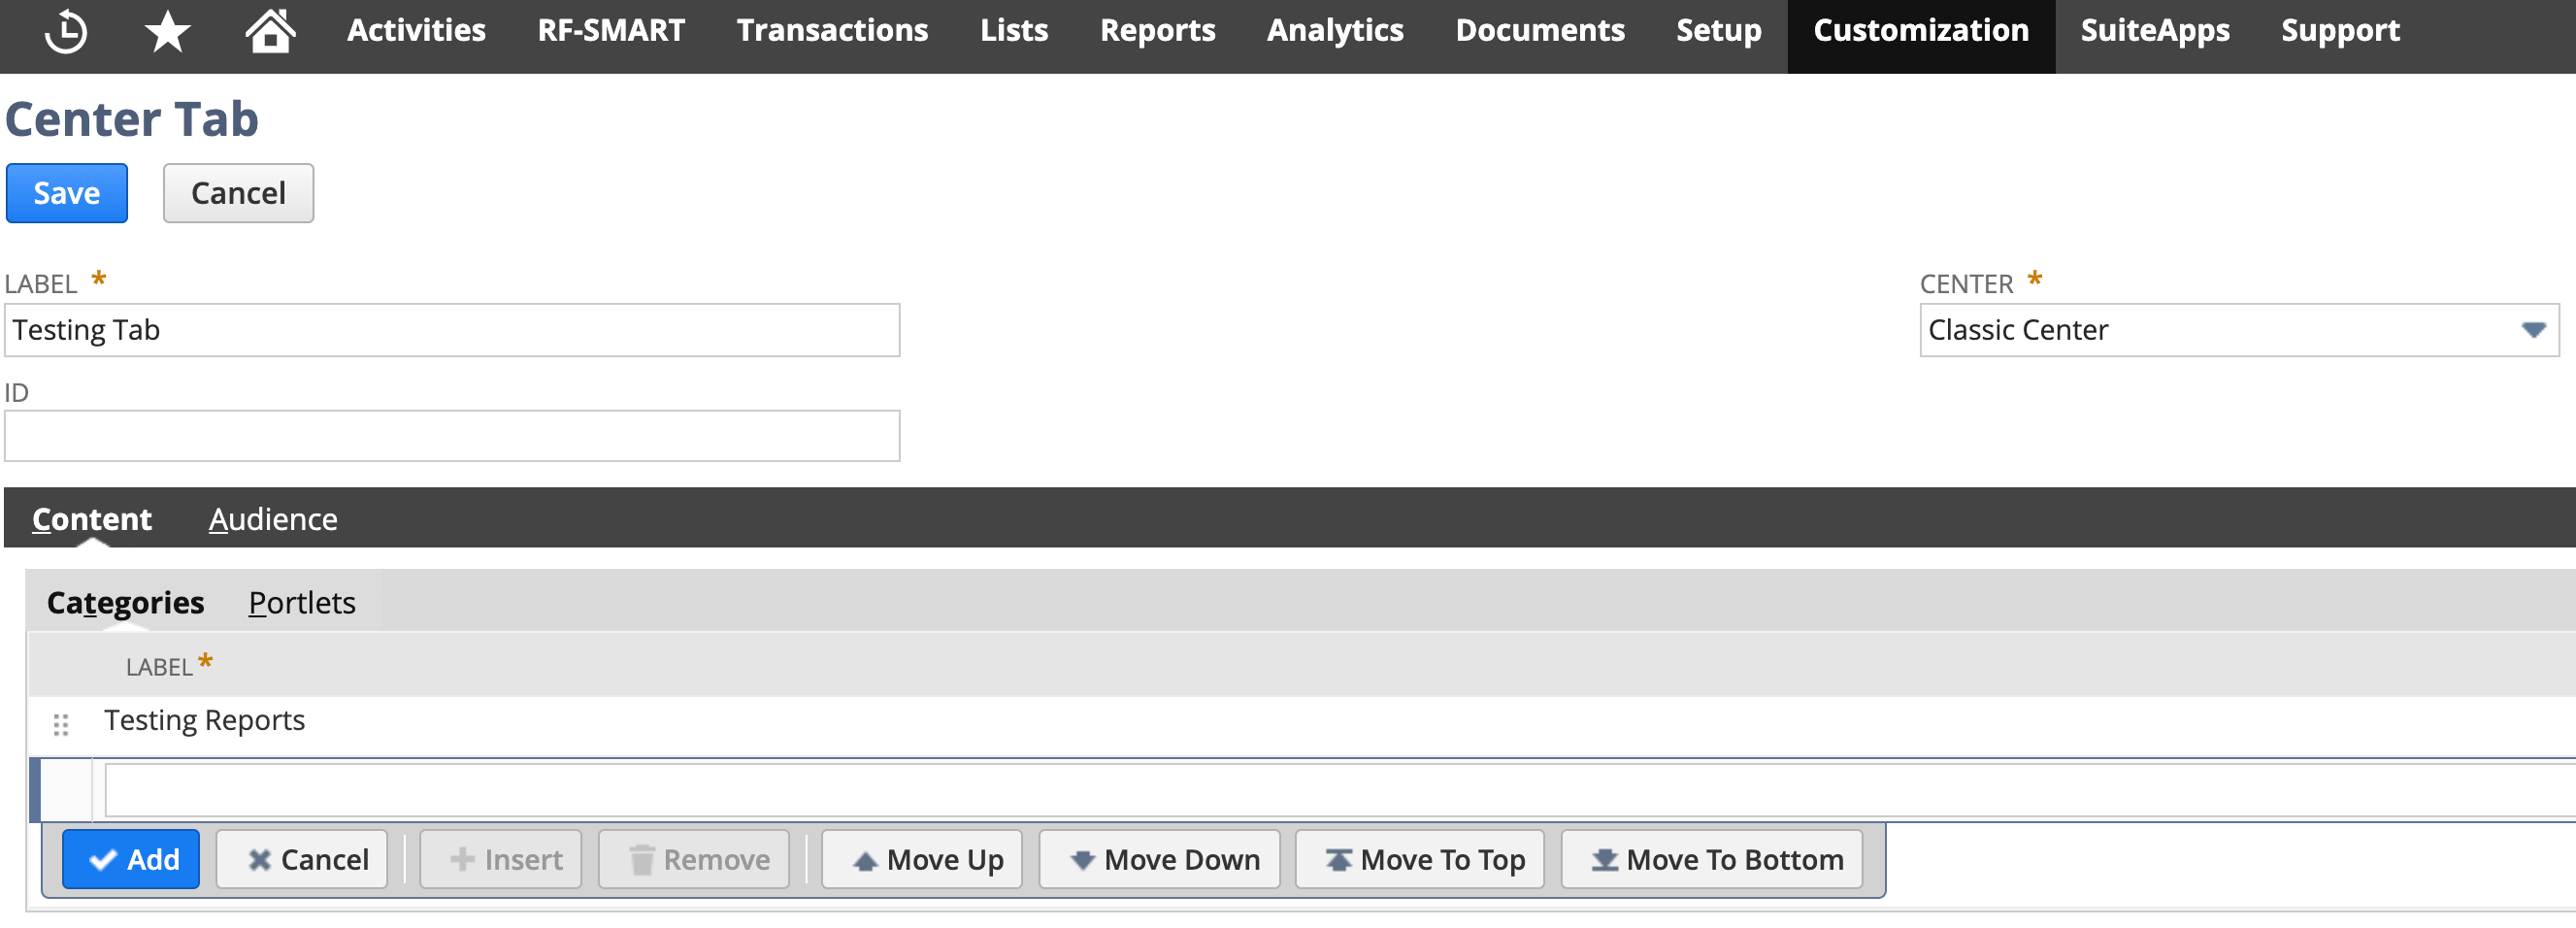
- Under the Categories sublist, enter a value or two. These will show up as child menus under the main Testing Tab menu, as shown in the screenshot above
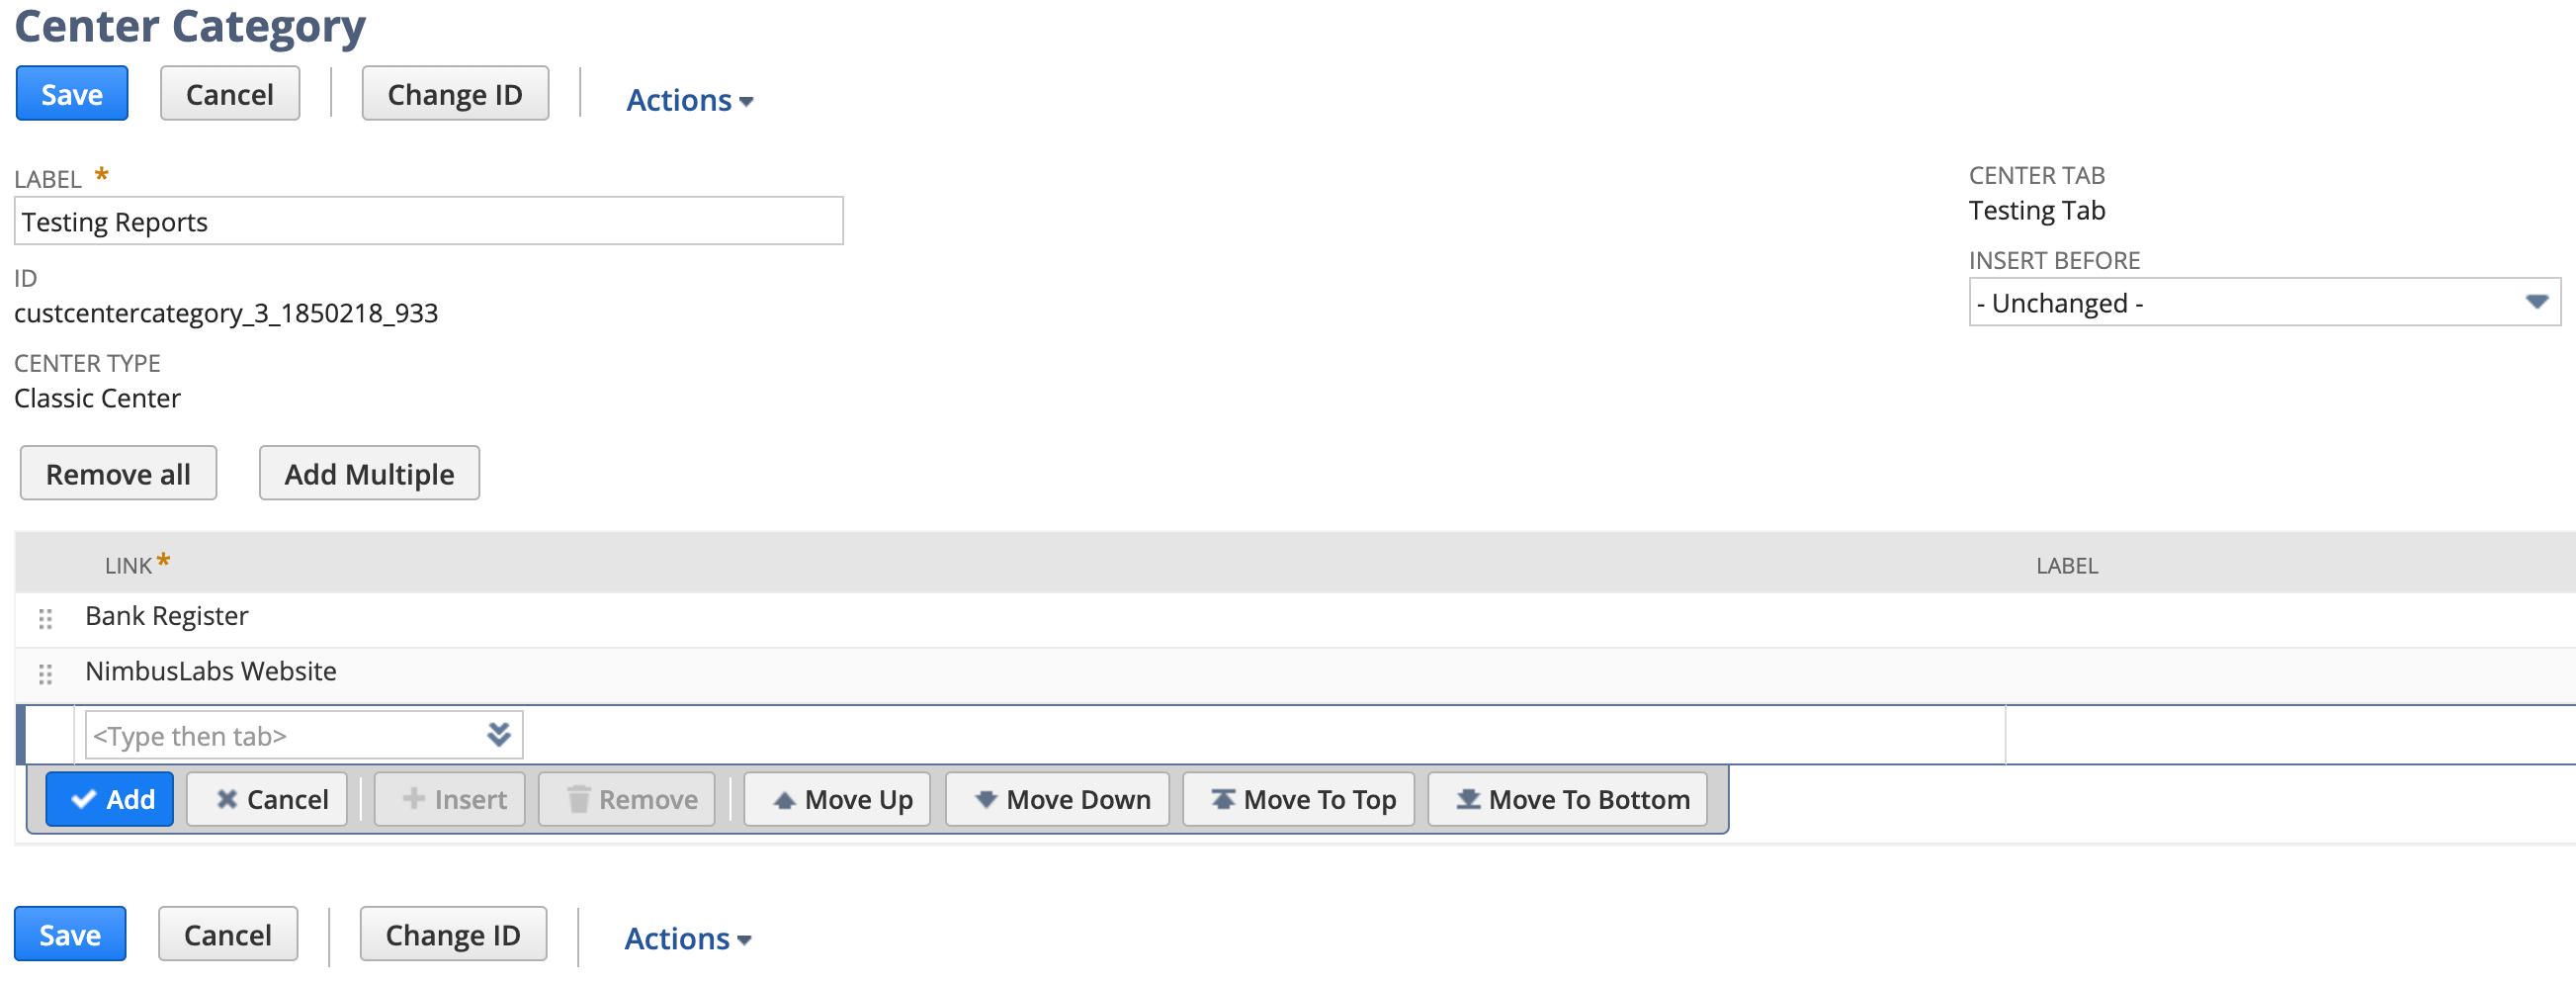
- Next, navigate to Customization –> Centers and Tabs –> Center Categories and choose the category you added above (Testing Reports) in Edit mode
- Here, you can add any report/page/search/etc in the Link sublist. You can choose any existing page/search/report or a Custom Link
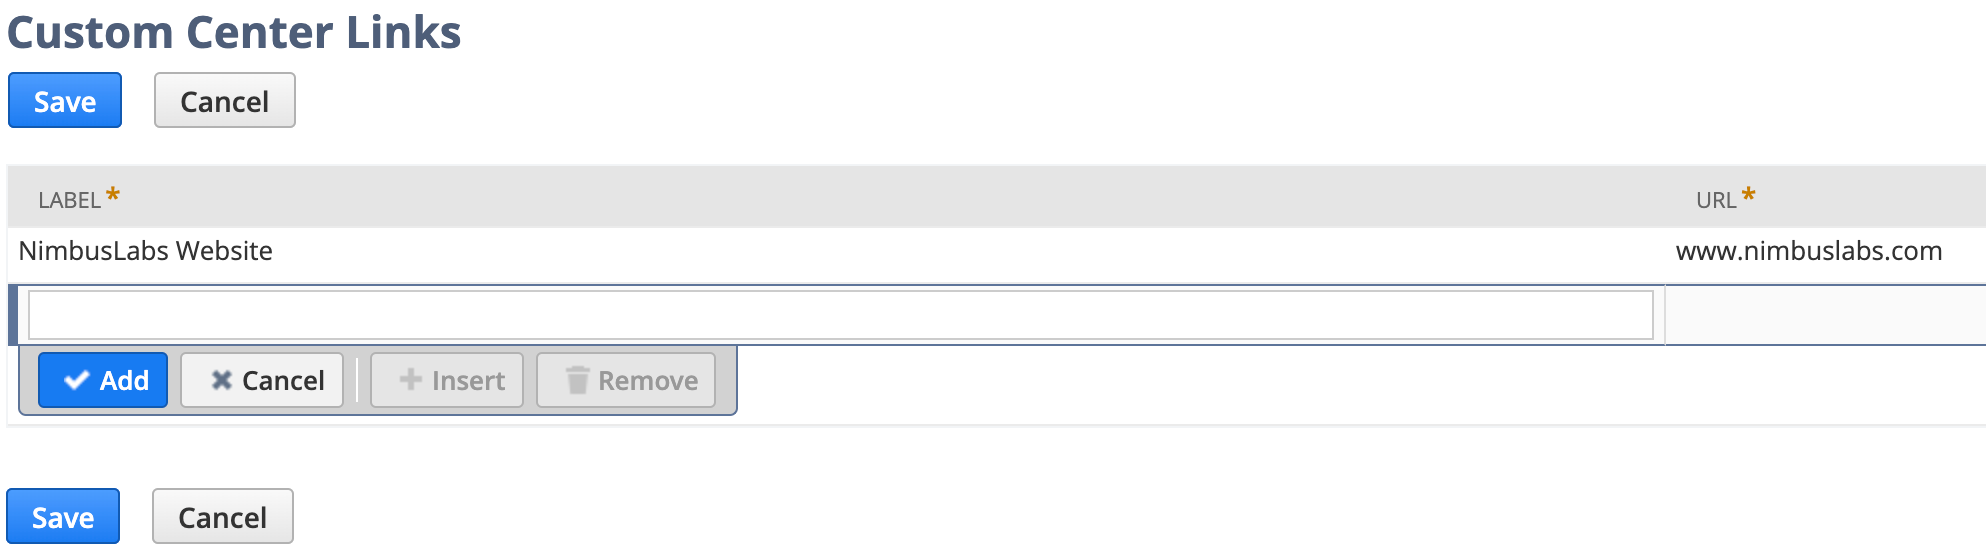
- To create a custom link, navigate to Customization –> Centers and Tabs –> Center Links
- Here, you can add any URL needed, even external URLs! So, if you need to direct users to an external website, you can enter the label and URL here and click Save.
- Once you have all of your Links populated on the Center Category, click Save
- Success! You should see your new Custom Tab on the main menu bar
Questions? Click the Contact Us page or leave a comment here and we will reach out!